@RTEditor:
RealTimeEditor, copy the folder into your ArmA directory and include it into your '-mod'-list.
Manual:
Contains this manual
MPMissions:
Sample multiplayer missions.
RTE Capture:
Contains ArmARTECapture.exe, RTE Capture, which is required for export. Save the folder at any place you like to.
More details in section "export".
RTE_Export:
RTE_Export.sqf and KRON_Strings.sqf, more infos in the code section.
Preview a map in the editor. Press "ESC" and choose "RealTimeEditor" to start RTE. The camera can get controlled by using "WASDXCQZED". Double click on the ground to create a unit. Select a unit by clicking on the unit. Use "shift" to rotate objects, "ctrl" to raise height.
Be aware that the use of the character '|' is not allowed and '||' has to get replaced by 'or'.
Clicking and holding down the mousebutton will now get referred to as 'clicking'.
When no mouse button is mentioned, it automaticly refers to the left mouse button.
As an alternative to left-clicking on an object, you can use the "alt" key.
The RTE can't know which side should be enemy to which side, so make sure that either all sides are already placed on the map or you made them enemys manually.
Open a map in the editor and place a player, then preview the map. In preview press "ESC" to enter the pause menu. Then choose "RealTimeEditor" to start the editor. Please note, that the RTE is only available in single player.
In the editor you can navigate using "WASD". The camera rotates using "X" & "C". The camera angle can be changed by pressing "Q" & "Z", to zoom in use "E" & "D" or the mousewheel. Additionally you can right click and move the mouse to move around. When pressing "shift" while moving the camera, the movement will be slower. Using "ctrl" will increase the speed of the movement.
You can switch to a first person camera by pressing "H". "WASD" moves the camera in the view direction. To look left and right use "X" & "C". To look up and down use "Q" & "Z". By pressing "E" you can switch the behaviour of "Q" & "Z" which changes the height of the camera.
At the start of the editor you are in "unit-mode". Available modes are "unit-", "weapon-", "group-", "trigger-", "waypoint-" and "markermode". To switch between the modes, click on the corresponding button or use "F1" to "F6". Independent of these modes you can select objects by clicking on the object, or by clicking to select all objects within that rectangle. As an alternative you can select them in the object tree. Use this procedure in combination with "shift" or "ctrl" to add or remove the object(s) from the selected objects.
You are able to save selected objects or a location using "ctrl" + "1" through "0". To reselect the objects or to move to one of the available location(s), press "1" trough "0". When using "shift" the objects will get added to the current selection.
To delete units, select them and press "delete."
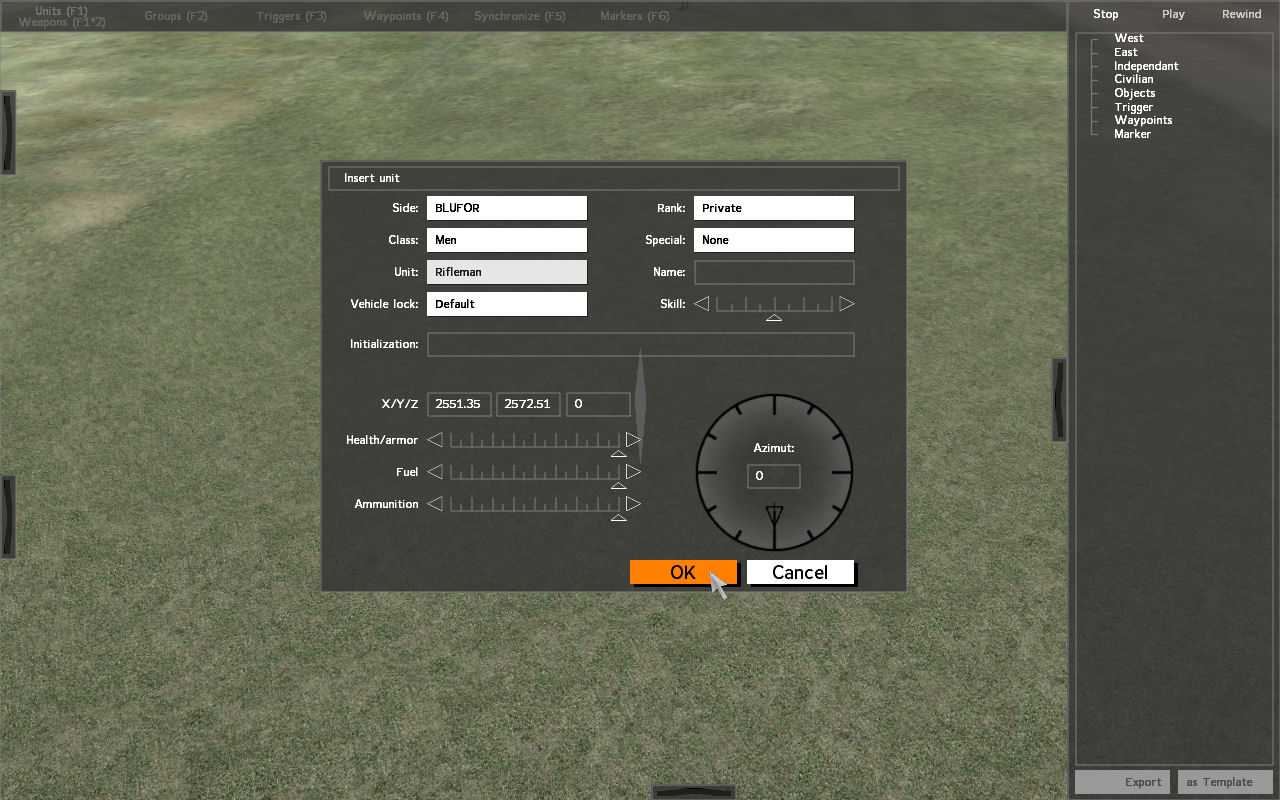
Double click on the ground while in "unit-mode" to create a unit. The dialog behaves like the ArmA mission editor dialog.
When clicking on a selected object while pressing down the "shift" key and moving the mouse, you change the angle of all selected objects. The same procedure and the "ctrl" key changes the height of the selected objects.
In "weapon-mode" you are able to place weapons. The behaviour is the same as "unit-mode".
Double click on the ground while in "group-mode" to create a predefined group. Then select the group like in ArmA Editor.
When clicking on a selected unit while pressing the "shift" key, you enter the regroup-mode. The selected units will join the group of the unit when you release the mouse. When releasing the mouse on ground and not on a unit, the units will join grpNull, therefore create a new group.
Double click on the ground while in "trigger-mode" to create a trigger. Then select the properties of the trigger like in ArmA Editor.
Please note that trigger(s) are only visible on the map, not in 3D.
The rest of the handling is exactly like in "unit-mode".
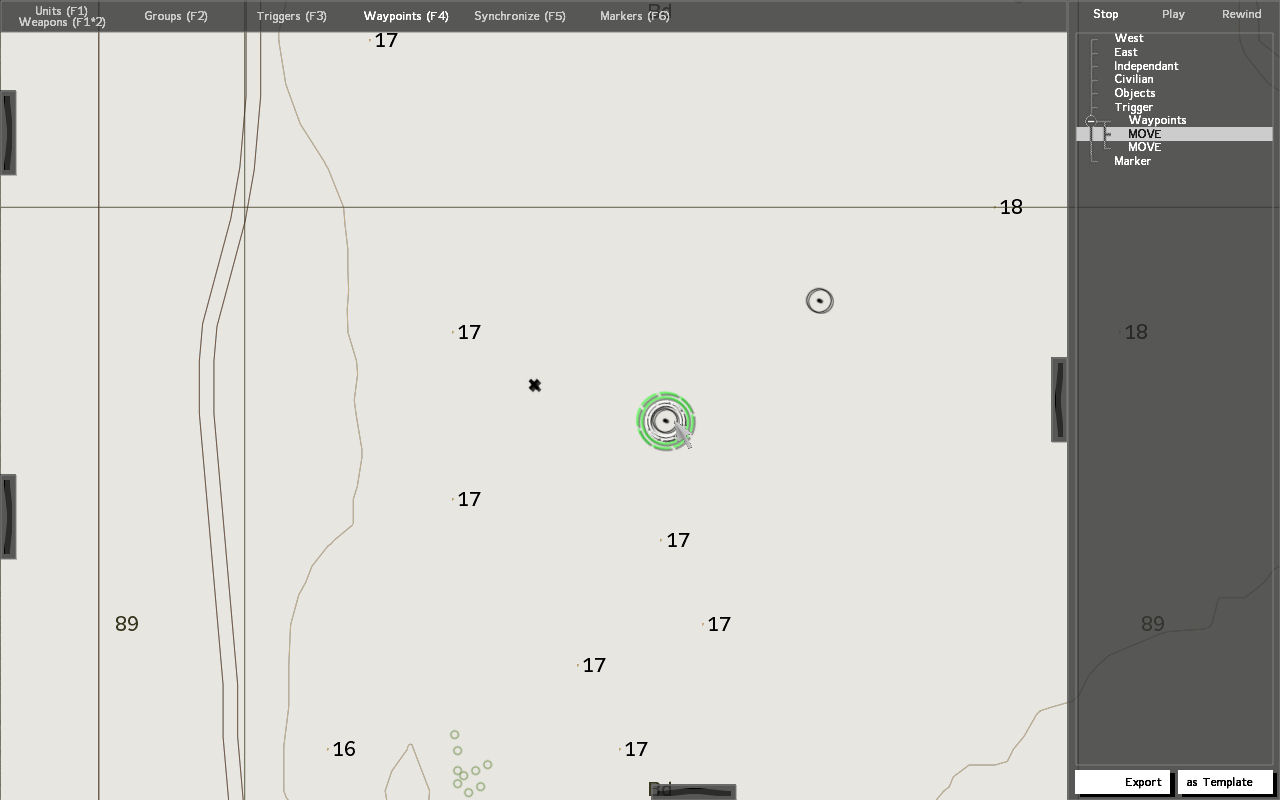
Double click on the ground while in "waypoint-mode" to create a waypoint. Then select the waypoint of the trigger like in ArmA Editor. If the selected objects are of one group, then the waypoint will get added to that group otherwise, it is a standalone waypoint.
Please note that waypoints are only visible on the map.
To connect a waypoint to an object, a group to a waypoint or a waypoint to a waypoint, just drag a line from one to the other. If you connect a group with a waypoint, the group will get the waypoint as their current waypoint. If you connect a waypoint to an object, the waypoint is refering to that object. For example a "Get in" waypoint refers to an object, so that the group knows in which vehicle they should get in.
To copy a waypoint, click on the waypoint while pressing "ctrl", then release the mouse on the point where you like to have the waypoint.
Double click on the ground while in "marker-mode" to create a marker. Then select the properties of the marker like in ArmA Editor.
Please note that marker(s) are only visible on the map, not in 3D.
The rest of the handling is the same as "unit-mode".
The numpad can be used for fine positioning. Select some objects, then use "4", "6", "8" & "2" on the numpad to move the objects around. When you press "Shift" and use "4" or "6" the objects will get rotated. Using "Ctrl" and "8" & "2" will raise the selected objects.
There is also a note to "Alt" in the beginning, but the "Alt" key can be really powerful and helpful and so it deserves an own section. "The "Alt" key is an alternative to left-clicking on an object" says the note. But what does this mean in the RTE? Select some objects, press and hold "Alt", then move the mouse. The selected objects will start moving depending on the mouse movement, just like the normal move. But since it don't require a click onto the object, it only works with units within houses or other objects.
This also works in combination with "Shift" or "Ctrl".
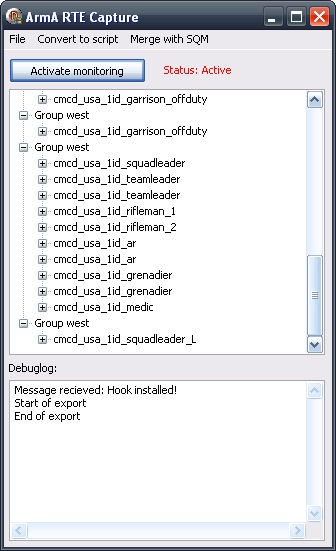
Start ArmA, then start RTE Capture (ArmARTECapture.exe) and activate monitoring. Switch back to ArmA. Select the objects you wish to export and click on "Export" (below the object tree):
The exported objects appear in RTE Capture. Don't forget to save the items in RTE Capture.
"Convert to script" will convert the currently loaded xml-file into a sqf-script. To create the objects in ArmA, simply run that created script by the "Init.sqf".
Templates are scripts that require a position to work. Normal exported units will always appear at the same position. Units from Templates will appear at the given position.
As an example: If you would like to have multiple roadblocks on your map, you could either create one for each position and export them normally or just create one template and run it for each position.
Select the objects just like the normal export. Then click on 'as Template' instead of export. Fill out the following dialog and press OK. The template name is required!
The use of structured text is allowed in the description.
The description will be useful in future revisions.
Templates will automaticly get saved in the template-folder of RTE Capture.
The Template script expects a marker to be given. The position and direction of the marker will be used to determine the object's position. The marker will get deleted.
"Marker"execVM"Script.sqf";
As a new feature of revision 3, you can also give the position and the direction of the template via script.
if (isServer) then {
//Check if the RTE is installed and otherwise loads the required functions:private ["_skript"];
_skript = [] execVM"RTE_Export.sqf";
waitUntil {scriptDone _skript};
//run the export-scripts:
[] execVM"Script1.sqf";
[] execVM"Script2.sqf";
.
.
.
//run the templates:
"Marker1" execVM"Template1.sqf";
"Marker2" execVM"Template2.sqf";
.
.
.
};
Important note:
To have those scripts work properly in all kind of situation make sure to have a bluefor, an opfor, an independant and a civilian unit already placed on the map. As an alternative you can also create their centers and make them enemys as they should be.
When you execute those scripts local and have the RTE installed, then the units will not move until you enter the "real time" mode by pressing "Play".
To add units that where placed outside the RTE, create a trigger covering those units, set activation to "All" and on activation: "{_x call ION_RTE_fAddObject;} forEach thisList". The units will then get added to the RTE. Remember that you can only add units and vehicles that way. It won't work for building.
When running scripts created by RTE Capture when having the RTE installed, the created units won't move until you press "Play".
When using those scripts on a dedicated server, make sure to have a unit from each side placed on the map. Otherwise the units of that side won't get created.